Quick & Juicy Air Fryer Chicken Breast: Your Weeknight Hero
In the whirlwind of busy weeknights, finding a protein that’s both quick to prepare and incredibly satisfying can feel like a culinary quest. Enter the air fryer chicken breast – a true kitchen MVP that promises tender, juicy results with minimal fuss and maximum flavor. Forget dry, uninspired chicken; this method elevates the humble boneless, skinless chicken breast to a starring role on your dinner plate, making it the ultimate solution for quick meals, effortless meal prep, and genuinely delicious dining.
Whether you're new to the air fryer craze or a seasoned enthusiast looking for your next go-to recipe, mastering the art of the air fryer chicken breast is a game-changer. We’ll dive into the essential techniques, clever tips, and even a secret ingredient that ensures every bite is bursting with moisture and flavor, making those "what's for dinner?" moments a thing of the past.
Why Air Fryer Chicken Breast is Your New Weeknight Hero
The appeal of the air fryer is undeniable, and nowhere is its magic more evident than with chicken breast. This appliance transforms a potentially bland ingredient into a culinary delight, offering a trifecta of benefits that make it indispensable for busy households:
- Unbeatable Speed: In just about 25 minutes, you can have perfectly cooked chicken breast ready to go. No lengthy preheating of a conventional oven, no constant monitoring of a stovetop pan.
- Effortless Cleanup: Most air fryer baskets are non-stick and dishwasher-safe, drastically cutting down on post-dinner chores. Less mess means more time for you.
- Reliable Results: The circulating hot air cooks the chicken evenly from all sides, locking in moisture and creating a beautifully golden exterior without the need for excessive oil. This consistency makes it a dependable choice every time.
- Ultimate Versatility: A perfectly cooked air fryer chicken breast isn't just a meal in itself; it's a blank canvas. Slice it for salads, tuck it into sandwiches, shred it for tacos, or dice it for pasta. The possibilities are endless, making meal planning a breeze.
This isn't just a recipe; it's a back-pocket solution you'll reach for again and again when life gets hectic but you still crave a wholesome, delicious meal.
Mastering the Basics: Simple Steps for Perfect Air Fryer Chicken Breast
Achieving truly juicy and flavorful air fryer chicken breast doesn't require gourmet skills; it's all about following a few key steps. Here's how to ensure success every time:
Prep for Perfection
- Pat Dry: This crucial first step helps achieve a crispier exterior and allows seasonings to adhere better. Use paper towels to thoroughly pat down both sides of your boneless, skinless chicken breasts.
- Oil Up: A light coating of olive oil (or avocado oil) serves multiple purposes: it helps the seasonings stick, promotes even browning, and locks in moisture. A tablespoon or two is usually sufficient for 2-3 breasts.
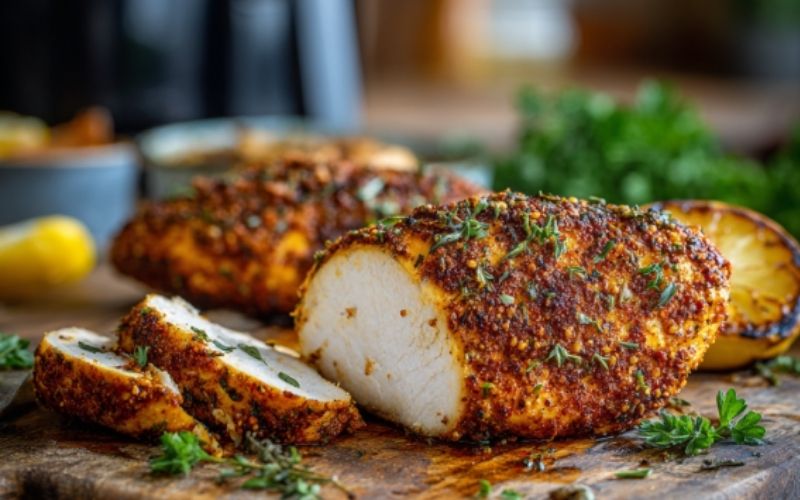
- Season Generously: This is where the flavor comes alive. A classic, pantry-friendly blend includes garlic powder, paprika, Italian seasoning, salt, and black pepper. Don't be shy – rub the seasoning mix thoroughly over all surfaces of the chicken. Feel free to customize with your favorite spices, like onion powder, chili powder, or a touch of cayenne for heat.
The Air Frying Process
- Preheat (Optional but Recommended): While some air fryers don't strictly require preheating, doing so helps create a more consistent cooking environment, leading to better browning and more evenly cooked chicken. If your model has a preheat setting, use it for 3-5 minutes at your target temperature.
- Temperature & Placement: Set your air fryer to 375°F (190°C). Arrange the seasoned chicken breasts in a single layer in the air fryer basket. Ensure there’s space between each piece for proper air circulation – this is vital for even cooking and achieving that desirable golden crust. Avoid overcrowding at all costs.
- Cook & Flip: Cook the chicken for approximately 10-12 minutes on one side. Then, using tongs, carefully flip each breast. Continue cooking for another 8-10 minutes, or until the internal temperature reaches 165°F (74°C).
- Check for Doneness: This is arguably the most important step for preventing dry chicken. Always use a reliable meat thermometer inserted into the thickest part of the breast. The magic number is 165°F (74°C). Pulling the chicken out exactly at this point ensures it's cooked through but not overdone.
- Rest: Once cooked, transfer the chicken breasts to a cutting board and let them rest for at least 5 minutes. This allows the juices to redistribute throughout the meat, ensuring every bite is tender and succulent. Skipping this step often leads to dry chicken, as the juices escape when you cut into it too soon.
Unlock Next-Level Juiciness: The Baking Soda Secret
While the basic method yields fantastic results, what if you want your air fryer chicken breast to be not just good, but *exceptionally* juicy – so tender it practically melts in your mouth? The secret lies in a brilliant technique borrowed from Chinese cuisine called "velveting," and its unassuming star ingredient: baking soda.
For years, many of us have relegated boneless, skinless chicken breast to a supporting role, often finding it bland or dry despite our best efforts. Velveting changes that narrative entirely. It’s the trick behind those incredibly tender pieces of chicken you find in stir-fries, and it translates beautifully to the air fryer.
How the Velveting Technique Works:
- The Baking Soda "Brine": Before seasoning, prepare a quick soak for your chicken. For every pound of chicken breast, dissolve about ½ teaspoon of baking soda in ¼ cup of water.
- Soak & Rest: Submerge the chicken breasts in this baking soda solution and let them sit for just 15-20 minutes. Do NOT go longer than this, as too much time can break down the proteins excessively, leading to a mushy texture.
- Rinse & Pat Dry: After soaking, thoroughly rinse the chicken under cold water to remove any residual baking soda flavor. Pat the chicken completely dry before proceeding with the olive oil and seasoning steps mentioned in the basic method.
The science behind it is fascinating: baking soda is an alkaline ingredient that subtly raises the pH of the chicken's surface. This helps to tenderize the meat by loosening protein fibers. It also creates a protective barrier that seals in natural moisture during cooking. The result is an unbelievably succulent, tender interior with that signature golden air-fried exterior. If you've struggled with dry chicken in the past, this technique is a game-changer. For a deeper dive into this amazing method, check out our article on Unlock Ultra-Juicy Air Fryer Chicken Breast: No More Dry Meals.
Essential Tips for Air Fryer Chicken Breast Success
- Don't Overcrowd the Basket: This cannot be stressed enough. Air fryers work by circulating hot air. If the basket is too full, the air can't circulate properly, leading to steamed (not crispy) and unevenly cooked chicken. Cook in batches if necessary.
- Consider Thickness: Standard cooking times are for average-sized breasts (about 6-8 oz and 1-inch thick at the thickest part). Thicker breasts will need more time, while thinner ones will cook faster. For very thick breasts, you can butterfly them or pound them lightly to an even thickness for more consistent cooking.
- Always Use a Meat Thermometer: Relying on visual cues is a recipe for disaster (and potentially dry chicken). A meat thermometer is your best friend for food safety and preventing overcooking.
- Clean Your Air Fryer Regularly: Food particles left in the basket can smoke and affect the flavor of subsequent meals. A clean air fryer performs better and ensures cleaner flavors.
- Experiment with Flavors: While the basic spice blend is fantastic, don't limit yourself! Try a lemon-herb mix, a smoky BBQ rub, spicy Cajun seasoning, or a zesty lime-cilantro blend. The versatility of air fryer chicken breast makes it perfect for countless flavor profiles.
Versatility Beyond the Basket: Making Your Chicken Work for You
One of the greatest advantages of perfectly cooked air fryer chicken breast is its incredible versatility. It's not just a standalone meal; it's a foundation for countless culinary creations. This makes it an invaluable asset for meal prep, ensuring you have delicious, healthy protein on hand throughout the week.
- Salad Star: Slice or dice your cooked chicken breast and add it warm or cold to your favorite green salads for a hearty, satisfying meal.
- Sandwich & Wrap Filler: Shred or slice for gourmet sandwiches, wraps, or even quesadillas. It pairs beautifully with pesto, avocado, or a spicy mayo.
- Pasta & Grain Bowls: Toss cubed chicken into pasta dishes, stir-fries, or grain bowls (like quinoa or rice) for an instant protein boost.
- Global Flavors: Adapt the seasoning to match different cuisines – Italian herbs for pasta, a touch of curry powder for an Indian-inspired bowl, or chili-lime for a Mexican-themed dish.
- Meal Prep Powerhouse: Cook a larger batch at the beginning of the week and store it in the fridge. You'll have ready-to-eat protein for quick lunches and dinners, saving you time and stress.
For even more inspiring ideas on how to incorporate this amazing protein into your weekly rotation, explore our article on The Best Air Fryer Chicken Breast Recipe for Tender, Flavorful Meals.
Conclusion
The air fryer chicken breast is truly a kitchen marvel, transforming a simple ingredient into a quick, flavorful, and incredibly versatile meal solution. By focusing on proper preparation, precise cooking temperatures, a crucial resting period, and perhaps even embracing the secret baking soda velveting technique, you can banish dry chicken from your life forever. This reliable, easy-to-clean method ensures that even on the busiest weeknights, a delicious, juicy, and wholesome meal is always within reach. So go ahead, fire up your air fryer and discover your new weeknight hero!
